How to Add Screenshots to Your Excel

Index Of The Blog
How to Add Screenshots to Your Excel
At times, you might need to include screenshots in your Excel spreadsheets. This could be snapshots of specific data ranges, charts within Excel, or screenshots from other software applications that you wish to insert into your spreadsheets.
Excel includes tools and options that enable you to capture screenshots the easy way. This is how you can capture screenshots of your spreadsheets and external applications with the Excel desktop app.
How to Capture Spreadsheet Screenshots With Excel’s Camera Tool
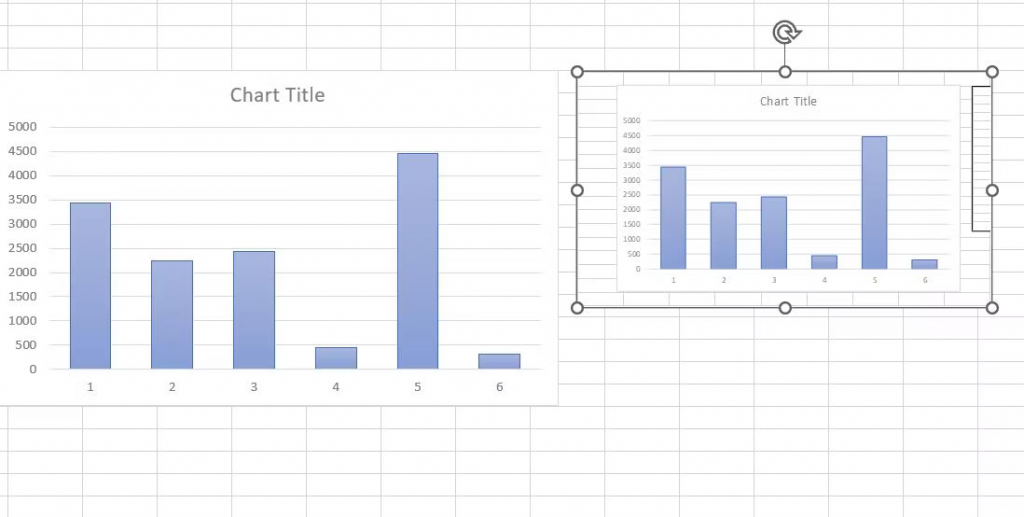
Excel has a built-in camera tool with which you can capture a screenshot of any selected area within your spreadsheet. That utility enables you to take snapshots of data ranges, charts, and tables from one sheet and then add the screen clippings to different areas of your spreadsheet.
The camera tool isn’t enabled by default in Excel. It’s an optional utility you can add by customizing the Quick Access Toolbar in Excel. You can enable Excel’s camera tool and take screenshots with it as follows:
- Click Excel’s File tab.
- Select Options to view Excel’s settings window.

- Click the Quick Access Toolbar tab in the Excel Options window.
- Select All Commands on the drop-down menu.
- Next, select Camera and click Add.

- Click OK to exit Excel Options. Now, you should see a Camera tool option on Excel’s Quick Access Toolbar.
- Open a spreadsheet to capture a screenshot from in Excel.
- To take a screenshot, hold down the left mouse button and drag over a data range or chart in your spreadsheet.

- Next, click on the Camera option.

- Go to an area of the spreadsheet where you want to insert the screen clipping.
- Press and hold the mouse’s left button and drag a rectangle area for the screen clipping. Release the mouse button to insert the data range or chart screenshot.

The inserted screenshot is a picture you can rotate and resize with the mouse. You can also select various editing options on the Picture Format tab.
For example, move the cursor over Picture Effects to select an effect option within the Shadow, Reflection, Glow, Soft Edges, and Bevel sub-menus. Or select an option within the Picture Styles box to apply a style.

How to Capture Spreadsheet Screenshots With Excel’s Copy as Picture Option
You can capture screenshots of selected spreadsheet areas with Excel’s Copy as Picture option. That option enables you to copy selected sheet areas as bitmap images.
Then, you can paste the copied bitmap picture into another part of your spreadsheet. This is how you can capture spreadsheet screenshots with the Copy as Picture option:
- Open a spreadsheet that includes a data range, table, or chart in Excel.
- Press and hold the left mouse button to drag a rectangle around the area of the spreadsheet to capture a snapshot.
- Click Copy on the Home tab.
- Select Copy as Picture to capture the snapshot.

- Next, select the Bitmap radio button.

- Click OK to close the Copy Picture window.
- Then, scroll to the area you want to insert the image into the Excel spreadsheet and press Ctrl + V.

This pasting method will insert a picture of the captured spreadsheet area much the same as utilizing the camera tool. You can select all the same options for the screenshot from Excel’s Picture Format tab. Drag and drop the picture into a suitable position on your sheet and resize it with the cursor.
How to Capture External Screenshots With Excel’s Screenshot Tool
If you need to capture a snapshot of software outside of Excel, you can do so by utilizing the Screenshot tool. The Screenshot tool enables you to take a shot from the desktop area or a software window. You can capture external screenshots with the utility like this:
- Open a software window from which you want to take a screenshot.
- Then bring up Excel and open a spreadsheet file to add a screenshot to.
- Click the Insert tab.
- Press the Screenshot button.
- Next, click the Screen Clipping option

- Press and hold the left mouse button, then drag to create a rectangle around the area you want to include in the screenshot.

- Let go of the left button to take a snapshot. The captured external screenshot will appear within your Excel spreadsheet, where you can move and resize it as needed.

You can also take full-screen window screenshots instead of clippings. To do so, click one of the available window thumbnails within Excel’s screenshot tool. This action will capture a full-screen snapshot of the selected window.
Easily Capture All Necessary Spreadsheet Screenshots With Excel
Although you can feasibly capture screenshots for your spreadsheets with third-party screen-capturing tools, it’s quicker and more convenient to take the snapshots you need within Excel.
Capturing snapshots of your spreadsheets or external software packages is straightforward with Excel’s Camera, Screenshot, and Copy as Picture options. Those screenshot options are invaluable for capturing on-screen info from your Excel spreadsheets or other apps.
